 riderinstinct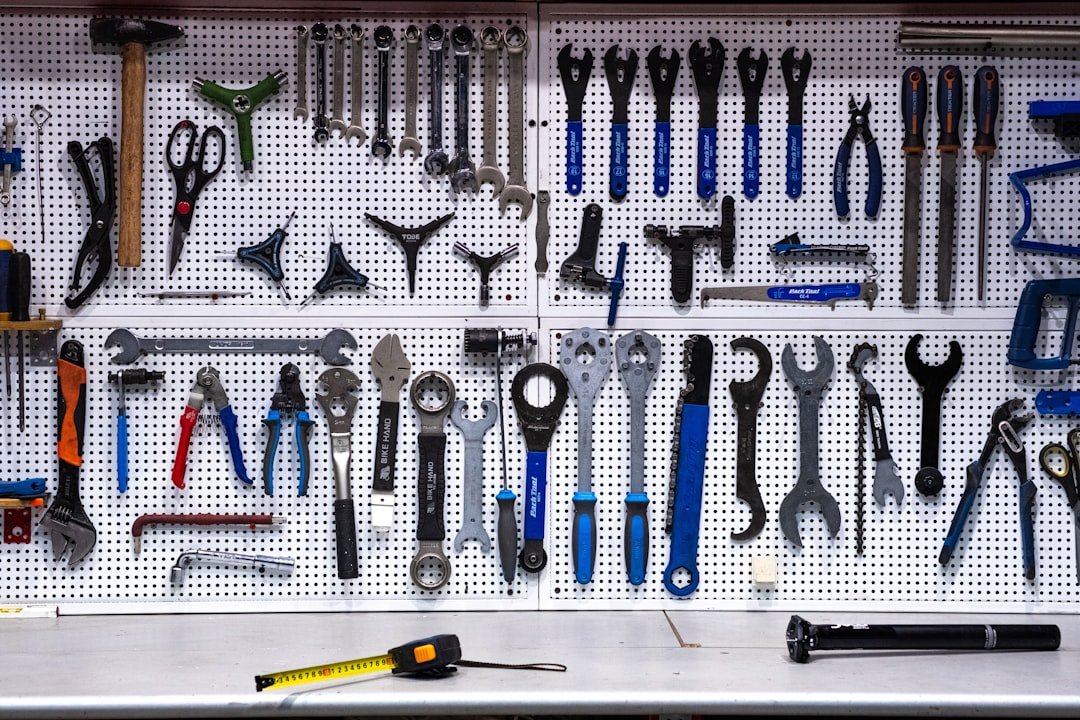
Why tool maintenance matters and how to decide what to keep
Tools are not disposable when it comes to motorcycle maintenance. Worn or damaged tools can round fasteners, deliver incorrect torque, slip and cause injury, or give inaccurate measurements that lead to improper maintenance. Before you accumulate every gadget on the market, use a decision framework: what routine jobs do you perform, what emergencies might you handle on the road, and which tasks you prefer to leave to a shop?
Consider three practical toolset sizes:
- Roadside essentials — small, portable items you’ll take on rides for minor repairs and adjustments.
- Home/basic maintenance set — a well-chosen collection of hand tools and a torque wrench for regular servicing (chain adjustment, brakes, oil changes, replace filters, basic electrical checks).
- Extended workshop set — specialized tools for deep engine, suspension or electrical work if you plan to work at garage level.
Trade-offs are real. A smaller kit is lighter to carry but may leave you unprepared. A full workshop rack covers most repairs but requires investment, space and maintenance. Choose tools that match jobs you actually do, then maintain them so they perform reliably when needed.
For help selecting tools by riding style and maintenance habits, see our buying guide: How to Choose the Right Tools for Your Riding Style.
Baseline toolkit essentials: purpose, preparation and inspection points
A baseline motorcycle toolkit focuses on hand tools that cover most fastener sizes, basic electrical checks, and a torque wrench. Keep the following categories and practices in mind.
Typical items and their purpose:
- Sockets and ratchet set (metric sizes common) — loosen/tighten bolts quickly with less rounding risk than adjustable tools.
- Combination wrenches — reach fasteners where sockets can’t.
- Torque wrench — tighten critical fasteners to specified settings. Verify model-specific torque values in the owner’s manual.
- Screwdrivers (Phillips, flat) and hex/Allen keys — small fasteners and bodywork.
- Pliers (needle-nose, slip-joint) and cutting pliers — grips, bends and wire tasks.
- Multimeter — basic electrical checks (voltage, continuity). Follow the multimeter manufacturer and your motorcycle manual for safe measurement ranges.
- Tire repair kit and portable inflator — short-term fixes; verify manufacturer guidance on repair limitations for your tyre model.
Preparation and inspection procedure before a job:
- Visually inspect each tool for cracks, bent jaws, rounded edges, worn tips or damaged insulation on electrical leads.
- Check socket and wrench contact surfaces for rounded corners or excessive wear.
- Check the torque wrench operation (does it click smoothly?) and test the multimeter leads for exposed wire or loose connectors.
- Gather protective gear: safety glasses, gloves, and a fire extinguisher nearby for electrical work if required.
Signs tools should be repaired or replaced:
- Deformed jaws or stripped tips.
- Loose ratchet mechanisms or sockets that wobble on the drive.
- Cracked handles or insulation on electrical tools.
When in doubt about a tool’s integrity, replace it. Compromised tools increase repair time and risk injury or damage to the motorcycle.
Specialty tools: purpose, safe use and how to maintain them
As your maintenance tasks become more advanced you’ll encounter specialty tools such as torque screwdrivers, chain alignment tools, fork seal drivers, bearing pullers and compression gauges. These tools are precise or perform high-force tasks and require additional care.
Purpose and safe-use checklist:
- Torque tools (torque wrenches, torque screwdrivers): Ensure the tool is rated for the needed range. Never use a click-type torque wrench as a breaker bar; reverse forces can damage the mechanism.
- Measuring tools (calipers, compression gauges): Use clean, calibrated surfaces and avoid dropping them. Dirt or impact can render measurements inaccurate.
- Presses and pullers: Apply force evenly and follow the tool instructions. Use protective guards and never improvise with makeshift supports.
Maintenance for specialty tools:
- Keep precision surfaces free of nicks and corrosion. Wipe with a lint-free cloth after use and store in protective cases.
- Lightly oil moving parts on pullers and presses to prevent rust and ensure smooth operation.
- Calibrate measuring and torque tools per the manufacturer’s schedule; keep calibration certificates when applicable.
When to consult a professional: If a specialty tool has been dropped, shows dented threads, or the torque tool fails to click consistently, stop using it and either have it inspected by a certified calibration service or replace it. Incorrect use of specialty tools can cause serious mechanical or safety issues on the bike.
Cleaning, rust prevention and lubrication: everyday maintenance steps
Simple cleaning and rust prevention extend tool life dramatically. Perform these steps after every dirty or wet job and as part of routine storage care.
- Remove dirt and debris: Use a brush and a rag to remove grit and grease. For stubborn deposits, a solvent compatible with the tool finish (e.g., mineral spirits) is effective — follow the solvent manufacturer’s safety guidance.
- Dry thoroughly: Moisture is the main cause of rust. Wipe tools with a dry cloth and let them air dry before re-oiling or storing.
- Light lubrication: Apply a thin film of light machine oil to pivot points, ratchet mechanisms and threads. Remove excess oil to avoid attracting dirt.
- Protect steel surfaces: For tools stored long-term, a rust-inhibiting spray or a thin film of preservative oil helps. For chrome or plated tools, keep them dry and store in a low-humidity environment.
Inspection points during cleaning:
- Check for pitting or flaking on metal surfaces.
- Test moving parts for stiffness or grinding — this can indicate contamination or wear.
- Inspect handles and grips for cracks that reduce control.
If you find deep rust, gouges or cracked parts, replace the tool. Surface rust can sometimes be removed with a fine abrasive and re-protected, but take care not to thin or distort the working surfaces.
Torque wrenches and precision tools: calibration, testing and safe procedures
Torque wrenches and measuring devices are safety-critical. Incorrect torque settings or bad measurements can lead to mechanical failure. Because these tools affect the bike’s structural and mechanical integrity, treat their maintenance seriously.
Preparation and safe procedure:
- Before using a torque wrench, verify the required torque values from your motorcycle’s service manual for the specific fastener and condition.
- Set the wrench to the required value using the scale or digital readout. Use a consistent pulling technique and apply steady pressure until the wrench indicates (click, beep or display).
- Store the torque wrench at its lowest setting and in a protective case to preserve the spring mechanism.
Calibration and testing:
- Manufacturers provide calibration intervals—follow theirs. If no schedule is available, consider annual calibration for frequent users or after heavy use, shock, or a fall.
- Calibration requires specialized equipment and is usually performed by certified calibration services. Keep calibration records if you perform professional-level work.
- If a torque wrench feels inconsistent (noisy click, variable feel), do not rely on it; have it checked or replaced.
Common pitfalls:
- Using an extension or crowfoot without accounting for the change in effective length—this alters the applied torque. Verify manufacturer guidance for such setups.
- Tightening beyond the tool’s rated range damages its mechanism and gives unreliable results.
When precision matters—brake calipers, axle nuts, steering head bearings—do not risk a suspect torque tool. Replace or professionally calibrate before performing critical work.
Electrical tools and their care: multimeters, battery chargers and connectors
Electrical diagnostics are common for motorcycle troubleshooting. Properly maintained electrical tools keep you safe and give reliable readings.
Multimeter care and safe usage:
- Inspect leads and probes for exposed wires or cracked insulation. Damaged leads are dangerous—replace immediately.
- Use the correct range and function for the measurement. If testing unknown circuits, start at the highest safe range to prevent overload.
- Store the multimeter and leads separately to avoid crushing or kinking the wires. Keep the battery compartment sealed and replace batteries before they leak or weaken readings.
Battery chargers and jump-starters:
- Follow the charger manufacturer’s recommendations for charging rates and battery chemistries. Overcharging or incorrect settings can damage the motorcycle battery.
- Inspect clamps and cables for corrosion, frayed insulation or loose connections. Clean terminals with a baking soda/water mix for lead-acid corrosion and apply a thin film of dielectric grease to prevent re-corrosion.
Signs to stop work and call a pro:
- Sparking when connecting clamps, burning smells, or heat from connectors indicate a fault—disconnect and seek professional help.
- If live-circuit troubleshooting is beyond basic voltage and continuity checks, consult a trained motorcycle electrician to avoid damage to electronic control units (ECUs).
For electrical specifications like charging voltages or battery type, always consult the motorcycle service manual and the tool manufacturer’s instructions.
Storage, organization and transport: keeping the kit functional on the road and at home
Good storage preserves tools and speeds up work. Use organization to find tools quickly and notice missing items before they’re needed.
Home workshop storage:
- Use tool chests with lined drawers or foam inserts to prevent tools from banging together and getting damaged.
- Keep tools off concrete floors. Concrete can wick moisture and accelerate rust—place shelving or cabinets above floor level.
- Label drawers or use shadow boards so you can detect when something is missing at a glance.
Portable and roadside kits:
- Use compact cases with molded slots for sockets and wrenches to avoid rattling and loss. Seal the case against moisture where possible.
- Limit the roadside kit to what you can safely use on the shoulder: a small set of wrenches/sockets, tire repair supplies, zip ties, electrical tape, a basic multimeter, and a compact inflator or CO2 cartridges depending on your tyre type. Be honest about what you can physically carry and use in roadside conditions.
Transport considerations:
- Secure heavy tools in the trunk or pannier so they won’t move and damage the bike or injure you when accessing luggage.
- Consider a modular approach: carry a lightweight roadside pouch while keeping a fuller kit at home.
Regularly audit your kits before long trips: check batteries, refill consumables, and make sure no critical tool has gone missing or become unusable.
Repair, replacement and knowing when to visit a professional
Not all maintenance should be DIY. Tools have limits, and so do home mechanics. Knowing when to stop protects you and your motorcycle.
When to replace a tool:
- Major deformation, cracked or fractured metal, or missing teeth on ratchets and sockets.
- Electrical insulation that’s cracked, exposing conductive parts.
- Precision tools that fail calibration checks or show inconsistent results.
When to seek professional service:
- Tasks involving steering head bearings, major engine work, welded structural repairs, or any work where failure could cause a crash.
- Complex electrical diagnostics tied to ECUs or adaptive systems where improper testing could trigger faults or damage sensors.
- If a tool fails mid-job and replacement isn’t immediately available — e.g., a broken socket stuck on a critical fastener — get professional help to avoid compounding damage.
How to verify model-specific intervals and settings:
- For torque values, fastener sequences, fluid types and service intervals, always consult your motorcycle’s owner or factory service manual. If you don’t have a physical copy, manufacturers often provide PDFs or dealer service departments can advise you.
- Tool manufacturers publish calibration intervals and conditions for warranty coverage. Follow their documentation for safety-critical tools.
When in doubt, stop and consult a professional — or at least a reputable service manual — rather than guessing. A small delay is better than a costly mistake or safety hazard.
Practical upkeep routine and final checklist
Create a habit-based routine to keep tools ready. The following schedule is practical for most owners; adjust frequency for heavy users.
Weekly or after every major job:
- Clean and dry tools, wipe moving parts with light oil, and return items to their designated spots.
- Inspect torques wrenches and multimeter leads for visible damage.
Monthly:
- Check sockets and wrench contact surfaces for rounding and test ratchet operation.
- Check battery charger connections and portable inflator operation; swap or charge batteries as needed.
Annually or after misuse/impact:
- Send torque wrenches and precision measuring tools for calibration if you use them often or subjected them to shock.
- Replace worn or pitted items; inspect storage conditions and improve humidity control if needed.
Below is a compact checklist you can print and keep with your toolkit.