 riderinstinct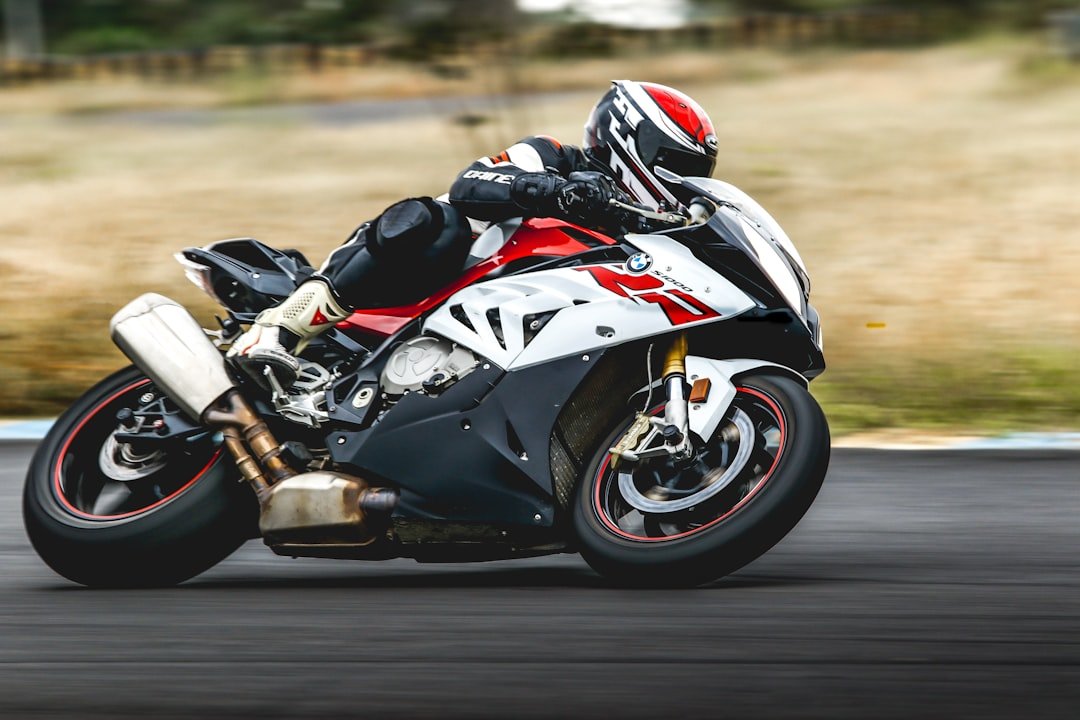
Why cornering matters — a practical decision framework
Cornering is where most riding skills converge: speed management, observation, motorcycle balance and traction all interact in a short window. Treat each corner as a small decision problem rather than a daring maneuver. That framework is:
- Perceive — What type of corner is it? Tight, sweeping, multiple turns? What’s the surface like?
- Decide — What line gives the safest margin? How much speed must you reduce to stay within your skill and traction limits?
- Act — Make predictable, smooth inputs: braking, countersteer, lean, throttle and body position.
There are trade-offs: a tighter line may be shorter but exposes you to oncoming traffic or uneven surfaces; a wide line may increase your exit speed but reduce visibility. Uncertainty often comes from what you cannot see — blind apexes, wet patches, gravel — so choose conservative options when risk is unclear.
Pre-corner setup: speed, position and vision
How you approach a corner determines how much margin you have. Use these pre-corner steps every time:
- Scan early and pick your line: Start observing the corner several seconds before you turn. Pick an entry, apex and exit that keep you visible to others and avoid debris or uneven pavement.
- Adjust speed on approach: Reduce speed while straight where the bike is most stable, using engine braking and progressive front brake. Avoid abrupt, heavy braking while leaned over.
- Select appropriate gear: Be in a gear that allows smooth throttle application through the corner — not so high that you bog down, and not so low that abrupt throttle causes chatter. Verify the correct gear for your motorcycle in the owner’s manual when exact engine speed is important.
- Position on the lane: Use the full lane as legal and safe: outer track on entry for better visibility, move toward apex and then to the exit line. Avoid crossing the centerline.
- Set your eyes: Look where you want to go — toward the exit or the next reference point. Your motorcycle follows your eyes.
These elements reduce surprises and give you time to correct if conditions change.
Step-by-step cornering technique — entry, apex and exit
Break a corner into three phases to simplify what can feel like a continuous maneuver.
- Entry: Complete most braking before you initiate the turn. Use a short, firm steering input to initiate the lean (countersteer) and settle the bike into the desired line. Keep your upper body relaxed and your arms soft; grip the bars lightly enough to feel inputs but not stiffly.
- Apex: The apex is the point where you are closest to the inside of the corner. For most public-road riding, aim for a late or mid-apex to maintain visibility and margin against unexpected hazards. Maintain a steady throttle or a slight roll-on through the apex to stabilize the bike.
- Exit: As you pass the apex, progressively increase throttle to straighten the bike and transfer load away from the front tire. Use this phase to accelerate smoothly and set up for the next corner or straight.
Throughout, keep your eyes up and scan beyond the curb. If you enter a turn too hot, prioritize a safe, stable line and slow down — abrupt steering corrections while leaned increase risk. Remember that small, deliberate inputs are what preserve traction and control.
Lean angle, countersteering and body position explained
Countersteering and lean are the mechanical ways a motorcycle changes direction. A brief, purposeful push on the outside bar initiates the lean. For example, to turn right, apply a small push on the right handlebar; the bike will lean right and begin the turn.
Important practical points:
- Countersteer is momentary: Once the bike is leaned, steer inputs become smaller corrections to maintain line.
- Body position matters: On tighter or faster corners, move your head slightly inside the turn and keep your outside knee and footpeg pressure consistent. For most street riding, large hanging-off positions are unnecessary and increase exposure to hazards; instead, use subtle upper-body lean and a neutral lower body to allow the bike to steer cleanly.
- Neutral posture: Keep your torso relaxed, elbows slightly bent, and look through the corner. Your hips and knees should help stabilize the bike without fighting the handlebars.
Do not try to measure or chase a specific lean angle without proper training and a controlled environment. If you need exact lean limits for performance riding, pursue track coaching and verify your motorcycle’s capabilities with the manufacturer or a reputable instructor.
Managing traction and reading the road surface
Traction is the limiting factor in cornering — when grip runs out, things go wrong fast. Control and preserve traction by keeping inputs smooth and by reading the surface early:
- Look for hazards: Oil patches, manhole covers, painted lines, gravel, wet leaves and road repairs reduce grip. Avoid these areas or cross them as upright as possible.
- Camber and off-camber corners: A road that tilts away from the inside of the corner (off-camber) reduces turning help from the surface and can make the bike stand up. Slow down and adjust line to regain margin.
- Tire condition and pressure: Correct tire pressure, tread and temperature matter. Never rely on a general number — check your owner’s manual and the tire manufacturer’s recommendations for your motorcycle and load. If you’re unsure, verify rather than guessing.
- Wet and cold conditions: Grip reduces significantly when the road is wet or cold. Reduce entry speed, avoid aggressive throttle, and widen your lines to keep options open.
When traction is uncertain, prioritize a slower, safer line and keep inputs small. Practicing hazard identification and slow-speed control in safe areas pays dividends on the road.
Braking in and through corners — what to use and when
Braking is safest on the straight. However, trail braking — reducing brake pressure gradually into the turn — is a technique used by experienced riders to fine-tune entry speed and load the front tire for more grip. On the street, use trail braking cautiously:
- Prefer braking before the turn: Most riders maximize safety by completing the majority of braking in a straight line before initiating lean.
- If you trail brake, do it smoothly: Apply progressively less brake pressure as the bike leans, and avoid abrupt releases or sudden inputs.
- Understand the limits: Trail braking reduces rear traction more quickly and leaves less margin for mistakes. It’s a useful corrective tool in experienced hands but increases risk for riders still consolidating basic cornering skills.
- ABS and electronics: If your bike has ABS or lean-sensitive traction control, these systems help in emergency situations but are not a substitute for sound technique. Relying on electronics without understanding their limits is a risk; use them as a safety net, not a primary strategy.
When in doubt on public roads, do most braking before the turn and use smooth throttle to stabilize through the apex and exit.
Planning for complex corners: multi-turn sequences and camber
Many roads present linked corners rather than isolated bends. Treat multi-turn sections as a single problem: plan your path through the entire sequence, not just the first bend.
- Look as far ahead as visibility allows: Identify the critical limiting corner — often the one with the worst visibility or tightest radius — and plan your speed around that.
- Apex choice matters: For linked corners, a slightly later apex on the first turn can give a better line for the next one, while an early apex might compromise the following bend. Choose an apex that prioritizes safety and visibility over lap-time-style lines.
- Adjust for camber: Positive camber (road tilts into the turn) helps grip; negative camber (tilts away) can push you toward the outside. Reduce speed and avoid aggressive inputs on negative camber corners.
- Use lane positioning defensively: On public roads, avoid the centerline on exit to prevent drifting into oncoming traffic should you be forced wide.
Practice reading sequences at slow speeds and build up to faster approaches only after consistent success under similar conditions.
Progressive practice: drills you can use and how to structure sessions
Skill growth is deliberate and staged. Use low-risk drills first, then add complexity as competence and confidence build.
- Slow-speed figure-8s and U-turns: Improve clutch and throttle modulation, balance, and looking through turns. Practice in an empty parking lot with cones for reference.
- Sweepers at controlled speed: Find a quiet stretch of road or large parking lot to set a series of wide arcs. Focus on consistent lines, smooth countersteer and throttle control. Don’t push speed; aim for repetition.
- Markers for apex and exit: Use cones or natural roadside references to practice hitting a consistent apex and smoothing throttle on exit.
- One-skill-per-ride approach: Dedicate a practice session to one skill — e.g., vision and head movement, throttle control or trail braking — rather than trying to improve everything at once.
- Get feedback: Use a qualified instructor, a riding coach or video analysis to identify subtle errors you can’t feel while riding.
Consider track days for high-speed skill transfer; the controlled environment, run-off and dedicated coaching are far safer than trying to practice high-speed cornering on public roads.
When to seek professional training and how to choose a coach
Cornering skills have a ceiling you can reach alone, and some limits you should not test without coaching. Consider professional instruction if:
- You feel unsure about countersteering, lean management or trail braking.
- You want to safely increase cornering speed on public roads or transition to track riding.
- Your bike’s power or handling makes mistakes more consequential.
Choose an instructor with the following qualities:
- Certification from reputable motorcycle training organizations or a strong teaching record.
- Clear progression plans and on-bike feedback (audio or follow-car review) rather than just classroom talk.
- Comfortable teaching at your pace and prioritizing risk management over style points.
Local rider training schools and trackday coaching are two effective routes. For most riders, a few structured lessons deliver bigger, safer gains than years of self-study.
Maintenance, gear and preparation that support safer cornering
Technique matters, but equipment and preparation set the stage. Before any spirited ride, check these items:
- Tires: Inspect tread depth, look for cuts or bulges and confirm pressures against the motorcycle and tire manufacturer recommendations before riding.
- Brakes and suspension: Ensure brakes are responsive and suspension settings are appropriate for your load. If you’re unsure how to set sag or damping for sporty cornering, consult a service manual or a qualified technician.
- Protective gear: A proper helmet, armored jacket, gloves and boots protect you in a fall. For performance-oriented practice, consider armored pants and back protection. Do not substitute comfort for protection.
- Pre-ride inspection: Quick checks of lights, controls, chain/belt tension and fluid levels reduce the chance of mechanical surprises mid-corner.
Good maintenance and fit-for-purpose gear increase your margin for error and let you practice skills with confidence.