riderinstinct
Why rain changes riding: a decision framework
Rain isn’t just slippery pavement; it changes four things at once: traction, visibility, predictability of other road users, and surface hazards (oil, debris, standing water). Treat wet riding as a different skill set rather than the same riding with a rain layer. That mindset alters your decisions: when to go, what speed to choose, which lane to use, and whether to ride at all.
Use this simple decision framework before you head out: assess the need to ride (can you delay or take a car?), evaluate the route (urban stop-and-go verses steady-speed highways), check the forecast and visibility, and confirm your equipment is appropriate. If any one of those boxes is clearly against you—poor visibility, heavy standing water on your route, or worn tires—postpone the trip or use alternate transport.
There are trade-offs. Riding slower reduces risk but increases time exposed to hazards. Taking a more circuitous route with better surface quality can be safer but may increase travel time. The best choice balances your comfort, the bike’s condition, and the consequence of an incident (traffic density, remoteness). Always weigh those factors honestly before starting a wet ride.
Pre-ride preparation: gear and bike checklist
Preparation reduces the chance of being surprised. Separate checks for rider gear and motorcycle systems shorten your mental workload when conditions deteriorate.
Rider gear
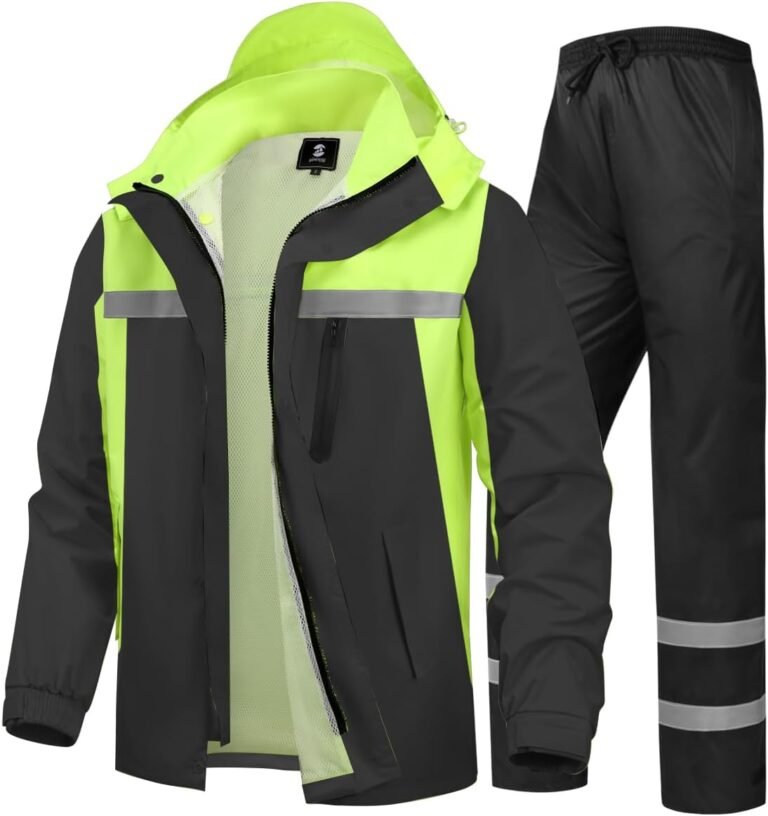
- Waterproof outer layer: a breathable waterproof jacket and pants are better than cotton; a thin rain suit over your normal kit works for unexpected showers.
- Gloves with good grip and waterproofing: wet grips are slippery; consider gloves that maintain tactile feel when damp.
- Visor/eye protection: an anti-fog insert, Pinlock-style lens, or a rain-specific visor treatment helps. Carry a soft cloth or microfibre for quick wipes during stops.
- High-visibility elements: bright panels or a reflective vest increase conspicuity in low-contrast, rainy light.
Motorcycle checks
- Tire condition and pressure: tread depth and correct inflation are critical for dispersing water. For exact pressure and load limits, verify your motorcycle or tire manufacturer’s documentation rather than guessing.
- Brakes: inspect pads and lever free play; wet pads can be less effective until warmed. Function test brakes before leaving low-traffic areas.
- Lights and signals: ensure headlights, taillights and brake lights work and lenses are clean—visibility is a two-way problem.
- Chain and controls: lubricate as needed and check for smooth operation; wet roads accelerate corrosion.
Follow the owner’s manual for any motorcycle-specific maintenance figures and procedures.
See and be seen: visibility strategies
In the rain, your ability to see and be seen drops quickly. Low daylight and spray from other vehicles reduce contrast and make motion harder to perceive.
On the rider side, keep your visor clear and your optics operational. Use anti-fog measures before you start: a Pinlock insert if your helmet supports it, an anti-fog agent, or simple airflow management (slightly opening the visor at low speeds if safe). If your visor floods with water, find a safe place to stop and clear it; riding with impaired vision is not acceptable.
To be seen, use your headlight, wear visible outer layers and position yourself so you’re not hiding in a blind spot. If you’ll be passing or being passed by traffic on a wet highway, drop a gear early and keep a steady speed to reduce unpredictable speed changes that can catch drivers off guard.
Remember: running lights don’t replace active scanning. Increase scanning frequency, looking further ahead to spot standing water or brake lights from stopped traffic sooner.
Braking and slowing: techniques for wet pavement
Braking in the rain requires earlier timing, smoother inputs and a plan for reduced and variable grip. Practice progressive braking: gradually increase lever or pedal pressure to allow the tire contact patches to settle and to avoid abrupt load transfers that can break traction.
- Slow down early: Begin braking sooner than on dry roads—double the distance mentally for initial planning if you’re uncertain of the surface.
- Use both brakes smoothly: Apply the rear brake first to stabilize the bike, then add front brake progressively. Avoid grabbing the front brake; a sudden, high front input is the most common cause of loss of traction on wet pavement.
- ABS awareness: If your bike has ABS, it helps prevent wheel lock-up. However, ABS is not invincible on standing water or very low-friction surfaces. Rely on smooth inputs and increased stopping distance even with ABS.
- Pulse and practice: Practice gradual, controlled stops in light rain or on a wet parking lot at low speed to learn feedback from your tires and brakes. Keep sessions short and in safe environments.
Always separate general technique from motorcycle-specific procedures that the owner’s manual details. For example, precise brake lever free-play, pad compound behavior, and ABS calibration are model-specific—verify those details with the manual or a qualified mechanic.
Cornering and lane choice in the wet
Cornering on wet roads means choosing lines that maximize available traction and minimize surprises. The key is to reduce lean angle, carry less speed, and ride the cleanest line through a turn.
- Reduce lean and speed: Enter corners slower and transition to a smaller lean angle. A shallower arc reduces the lateral force demand on the tires.
- Choose the best lane position: Avoid the ruts and darker patches in the wheel tracks where oil and grime concentrate. Move to the cleaner parts of your lane, which are often the outside third of the lane, but only if it’s safe and legal to do so.
- Avoid painted lines and metal surfaces: Painted lane markings, manhole covers and steel plates are very slippery when wet. If you must cross them, keep the bike upright and reduce power and brake inputs until you are on the regular surface again.
- Look through the turn: Keep your eyes up and scan to where you want to go. Smooth steering inputs and steady throttle are safer than sudden corrections mid-corner.
When riding unfamiliar roads in rain, treat every corner like it could be covered in low-friction contaminants and plan accordingly.
Throttle control and smooth inputs
Traction in the rain is often limited by how you use the throttle, steering and brakes. Abrupt inputs shift weight and can induce a loss of grip.
- Progressive throttle: Roll on the throttle gently when exiting corners. If traction feels marginal, wait briefly for the bike to stabilize before increasing power.
- Avoid abrupt steering inputs: Sudden handlebar corrections can unsettle the contact patch—use your body to make small, smooth steering adjustments where possible.
- Neutralize electronic aids: Some riders are tempted to switch off traction control for sportier feel. In the rain, traction control and ABS are valuable safety nets; leave them on unless you understand precisely how they alter handling for your bike and conditions.
Practice smoothness at low speeds: place cones or markers in a large empty parking area (if legal) and rehearse slow, controlled throttle transitions, steering inputs and stops.
Hazard recognition and avoidance
Wet roads hide hazards. Your goal is to detect and avoid them with time to react. Typical trouble spots include oil sheen at the start of rain, standing water, painted lines, metal plates, leaf piles and gravel runoff from higher ground.
- Oil patch behavior: The first 10–30 minutes of rain can bring oil to the surface and make intersections especially slippery. Be extra cautious when accelerating from stops.
- Standing water and hydroplaning: Standing water can defeat tire contact and cause a sudden wobble. Reduce speed before you encounter it. If hydroplaning occurs, avoid braking or sudden steering; gradually reduce speed and let the bike settle to regain contact.
- Watch for runoff and debris: After heavy rainfall, gravel and organic debris often wash onto the road from gutters and side slopes—avoid the edge of the lane where debris collects.
- Bridge decks and shaded areas: Bridges freeze earlier in cold weather and retain wetness longer in rain; approach them with caution and assume lower traction.
When you notice a hazard, communicate early to other road users by signaling and altering lane position predictably. If avoidance isn’t possible, prioritize keeping the bike upright: reduce brake and throttle inputs and steer smoothly through the hazard.
Post-ride care and maintenance after wet rides
Rain accelerates corrosion and mud, so post-ride care preserves bike reliability and extends component life.
- Rinse grit and road salt from the chain, swingarm, wheels and under-tray. Avoid high-pressure washers near bearings and electronic connectors—use gentle spray and brushes.
- Clean and lube the chain after it dries to prevent rust and accelerated wear.
- Dry electrical connectors; inspect for water ingress in aftermarket accessories if you notice intermittent electrical problems.
- Wipe visors and helmet vents dry and leave the helmet in a ventilated area to avoid mould and fogging compounds losing effectiveness.
Any post-ride adjustments that affect safety-critical systems (brake feel, suspension settings, tire pressures) should reference the owner’s manual or be done by a qualified technician.
A practical practice plan and when to seek formal training
Skill development should be deliberate, progressive and low-risk. Structure practice sessions around specific objectives and measurable outcomes.
- Session 1—Low-speed control: In a wet-but-safe parking area, practice clutch control and slow maneuvers. Goal: slow-speed balance without stalls or foot down for a set distance.
- Session 2—Progressive braking: Set markers at known distances and practice smooth stops at increasing entry speeds to learn braking feel in the wet. Goal: consistent stopping within a planned margin while maintaining control.
- Session 3—Cornering lines and lane position: Use low-speed curves or a quiet road to rehearse different lines and lean angles while holding off-throttle steady. Goal: maintain smooth arc with minimized lean.
- Session 4—Hazard drills: Practice riding over painted lines and small wet surfaces at low speeds to learn feedback; simulate sudden obstacles and practice safe evasive maneuvers.
Seek professional instruction when: you want accelerated, feedback-rich improvement; you ride in high-risk environments (urban commuting or twisty wet mountains); or you’re unsure about your limits. Verified rider training programs adapt scenarios and provide supervised, objective feedback that’s hard to replicate on your own.
For more detail on common pitfalls and how to structure practice safely, refer to related RiderInstinct resources: https://riderinstinct.com/common-riding-in-rain-mistakes-new-riders-make/ and https://riderinstinct.com/how-to-improve-your-riding-in-rain-skills-safely/.