 riderinstinct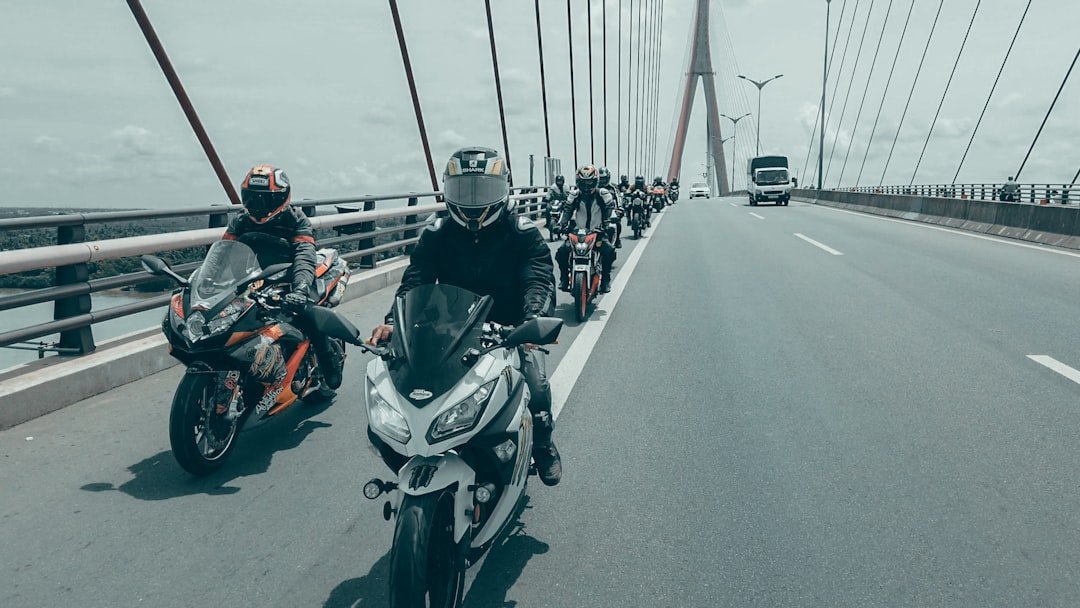
Why ride in a group? Trade-offs and a decision framework
Riding with others brings social value, improved visibility to other road users and logistical advantages for touring. However, group riding also multiplies the consequences of a single mistake: a poorly judged pass or an unexpected braking maneuver can affect many riders. Before joining or organizing a group ride, use a simple decision framework:
- Purpose: Is the ride casual (coffee run), recreational (twisty ride), or cross-country touring? The purpose dictates pace, planning and support needs.
- Compatibility: Do participants have similar bikes, equipment and experience? Mixed-experience groups require conservative pacing and clear roles.
- Risk tolerance: Agree on acceptable road types, pace and the use of advanced maneuvers. If anyone is uncomfortable, adapt the plan.
- Logistics: Consider fuel range, time windows, and navigation. Longer rides need more buffers for breaks and mechanical issues.
Understanding these trade-offs up front helps leaders set expectations and reduces pressure on individuals to ride beyond their comfort or skill level. When uncertainty or disagreement remains, choose the safer option: lower speed, shorter route, or splitting into smaller groups.
Roles and responsibilities on a group ride
Clear roles make a ride predictable. At minimum, assign a leader and a sweep (tail rider). Larger or more complex rides may use a road captain and leg leaders.
- Leader / Road Captain: Sets the pace, manages navigation, and makes decisions about route changes and regrouping. The leader should be confident at the agreed pace and able to communicate changes.
- Sweep: Stays at the back to ensure no one is left behind, helps riders in trouble, and reports back to the leader if the group splits or someone is delayed.
- Leg leaders / Tail markers: For large groups, intermediate riders can lead subsections and help keep formation and timing consistent.
- Individual riders: Are responsible for their own motorcycle control, maintaining spacing, following the leader’s instructions, and speaking up if uncomfortable.
Roles should be assigned before departure and everyone should know who to contact in case of an emergency. If using radios or intercoms, assign clear check-in points or times so communication is manageable rather than constant chatter.
Pre-ride planning: route, pace, fuel and contingency
Good planning reduces surprises. A pre-ride plan need not be elaborate, but it should cover key items and be communicated clearly.
- Route and navigation: Pick a route that suits the group’s skill level. For unfamiliar roads, consider sharing turn-by-turn routes through an app or providing printed cue sheets. Identify tricky sections and alternative routes in case of closure.
- Pace: Decide an average cruising speed and a maximum, and emphasize that the pace matches the slowest competent rider. Avoid competitive riding—sudden accelerations or braking create hazards.
- Fuel and rest stops: Calculate fuel range for the least efficient bike and plan stops with conservative margins. Pick regular regroup points rather than waiting until someone runs on fumes.
- Contingency planning: Agree on procedures for breakdowns, crashes or separated riders—where to meet, who calls for help, and how long the leader waits before moving on.
- Weather and daylight: Check the forecast and adjust plans for rain, extreme heat, or low light. Consider cancelling or rescheduling if conditions will likely exceed the group’s comfort or skill.
Document the essentials in a short pre-ride message or briefing so everyone has the same expectations.
Pre-ride briefing: what to cover and a sample script
A short, focused briefing sets the tone and clears up questions. Keep it under five minutes and cover the essentials.
Key items to cover:
- Roles and contact points (who is leader, sweep, any leg leaders)
- Route, key turns, and planned stops
- Expected pace and ride-by rules (e.g., staggered formation, how to indicate hazards)
- Signals: hand signals and any intercom usage
- Regroup plan for missed turns, mechanicals and emergencies
- Any special hazards on route (construction, wildlife, etc.)
Sample five-line script a leader might use before departure:
- “I’m the leader; Sarah is sweep. We’ll keep a casual pace—no racing.”
- “Staggered formation on the highway, single-file through the twisties. Compress early on hazards.”
- “Left hand up for hazards, left/right for lane changes. We’ll stop every 60–90 minutes for fuel/legs.”
- “If you get separated, go to the next planned stop. Sweep will wait for 10 minutes at each stop unless otherwise directed.”
- “Any questions? If not, we’ll roll in five—watch the leader’s signal to go.”
Make sure riders can ask clarifying questions. A rushed or unclear briefing undermines safety.
Formations and spacing: when to use staggered, single-file and compressed lines
Formation choice balances visibility, reaction time and road space. The two most common formations are staggered and single-file; both have clear use-cases and execution rules.
- Staggered formation (default for open roads):
- Provides lateral spacing and better visibility—each rider occupies their own lane position within a lane.
- Typical pattern: leader takes the left-third of the lane, second rider the right-third, third rider the left-third of the next safe spacing, and so on.
- Maintain a 2–3 second gap front-to-back to allow reaction time. The staggered formation does not create extra speed buffer; compress early if hazards require single-file.
- Single-file (narrow, winding, or heavy traffic):
- Used where lane space is limited, visibility is restricted, or for technical corners. Riders follow each other in the same lane position.
- Increase following distance in single-file—3–4 seconds or more depending on conditions.
- Compressed formations: Before intersections, hazards, or lane changes, compress your spacing so the leader can control the group through a maneuver and the sweep can collect stragglers at the next safe place.
When changing formation, the leader should signal the intention and move into the new position first. Do not switch formation unpredictably, and avoid abrupt speed changes. Individual riders must not race to fill a preferred slot; maintain steady throttle until the leader completes the transition.
Note: local laws may restrict lane sharing or two-abreast riding—verify legal requirements where you ride.
Communication: hand signals, intercoms and managing information flow
Effective communication in a group is concise, standardized and used sparingly. Too much chatter—or inconsistent signals—creates confusion.
Hand signals everyone should know:
- Turn/giveway: Left arm extended horizontally for left, right arm or left arm bent upward for right depending on local convention.
- Slow/stop: Hand waved palm down or multiple open-palmed waves to indicate slowing.
- Hazard left/right: Point with the left or right hand toward the hazard; follow up with palm-down waves to emphasize slow/stop if needed.
- Follow me/Check point: A pat on the helmet or hand gesture toward the rider in front to indicate regrouping or to follow a different route locally.
Audio communication (intercoms/radios):
- Use for safety-critical messages: stop, crash, mechanical, route change, or traffic hazard.
- Avoid conversational chatter that distracts riders from road focus. Keep transmissions short and structured: “Leader to group—stop left in 100 meters—hazard” is better than long commentary.
- Test equipment and battery life before departure; have a backup plan if comms fail (hand signals and pre-arranged meeting points).
Maintain a disciplined flow: leader communicates essential changes, sweep reports issues, and individual riders use hand signals to augment the primary channel.
Passing, lane changes and interacting with traffic
Passing other vehicles or changing lanes as a group requires clear protocol to avoid splitting the group or creating hazards. The core principle: safety first, predictability second.
- Passing slower vehicles:
- Only pass when legal and safe for the entire group. The leader should initiate the pass and confirm adequate sight distance.
- Pass as a unit where possible—each rider completes the pass safely and returns to lane position when they have the space, rather than bunching up ahead of the leader.
- Lane changes:
- Leader signals and moves first. The rest follow in order, maintaining spacing. If a rider cannot change safely, hold position in lane and indicate to the rider behind.
- Never force a lane change; accept a delayed transition and regroup at the next safe point.
- Interacting with traffic:
- Keep group size manageable: very large groups are harder for other drivers to judge and for the leader to control. Consider splitting into smaller waves if required.
- Be predictable in speed and lines. Avoid sudden braking, weaving, or lane-splitting for the entire group unless local law and conditions permit and all riders are trained.
When approaching traffic lights or intersections, compress and form a single-file to allow safe filtering and to reduce the footprint at the intersection.
Stops, mechanicals and emergency handling
How a group handles stops or trouble determines whether a day ends well or poorly. Plan for the most likely issues: low fuel, flat tires, mechanical breakdown, or a rider needing medical attention.
- Scheduled stops: Use regular, planned stops for fuel, food and rest. These are also checkpoints to confirm everyone is fit to continue.
- Unscheduled stops / breakdowns:
- Sweep should stop with the rider in trouble if it’s safe. A minimum two-person assistance (sweep + one other) is preferable for tasks like calling a tow or changing a flat.
- If you must leave the bike unattended, secure it and leave a clear note with the rider’s phone number when possible; notify the leader about location and situation.
- Crash or medical emergency:
- Prioritize securing the scene and calling emergency services. Move riders only if they are in immediate danger (traffic, fire).
- Keep a basic first-aid kit accessible and know the basics of first response. Do not attempt medical procedures beyond your training.
- Document the situation: who was involved, location, and ambulance/authority arrival details—this helps for insurance and police reports later.
- Paperwork and insurance: Carry emergency contact information and ensure each rider has valid registration and insurance documentation for their bike. If unsure about legal/medical steps, advise riders to call local emergency numbers immediately.
Regularly review and rehearse emergency procedures in private practice rides so the actions become automatic under stress.
Practice, progression and when to get professional training
Group riding skill is learned through deliberate practice and progressive exposure. Don’t assume street miles alone will make you a safe group rider.
- Drills to practice in a safe area:
- Formation riding at low speeds to practice smooth spacing changes and quick compressions.
- Group braking drills to learn consistent braking pressures and how to maintain spacing under slowing conditions.
- Lane-change exercises to practice orderly transitions while maintaining formation.
- Progression: Start with small, low-speed rides with riders you know. Gradually increase distance, complexity of route, and group size as confidence increases.
- Professional training: Consider an advanced rider clinic or a course that includes group dynamics or convoy riding. Professional instructors can identify bad habits and teach communication and emergency strategies that are hard to self-correct.
- When to seek help: If riders regularly struggle to maintain formation, if close calls occur, or if there are frequent arguments about pace and lines, pause group rides and get a coach or attend a class.
Regular, short practice sessions are more valuable than occasional long rides when developing consistent group behavior.
Legal and etiquette considerations
Beyond technique, group rides are subject to legal rules and community norms. Responsible groups reduce friction with other road users and authorities.
- Local laws: Lane sharing, filtering, and formation riding may be restricted in some jurisdictions. Riders must comply with local traffic laws at all times—verify before organizing a ride in a new area.
- Noise and community impact: Large or fast-moving groups can draw complaints. Respect residential areas, especially early in the morning or late at night.
- Ride etiquette: Keep conversations off the road, don’t race, and don’t pressure slower riders. Leaders should discourage reckless behavior immediately and remind the group of the agreed rules.
- Insurance and liability: Each rider is individually responsible for insurance; ride leaders should not assume responsibility for others’ actions. If you’re organizing a public or charitable ride, consider formal waivers or insurance advice from professionals.
Good etiquette preserves the privilege of group riding in your community and helps avoid legal consequences.