riderinstinct
Understand the decision framework before you buy or pack
Motorcycle camping is a bundle of choices. Start by answering these trip-defining questions before picking gear or routes:
- Route surface: Will you stay on paved roads, or include dirt/gravel/forest tracks? Luggage needs, mounting security and suspension setup change with off-road sections.
- Trip length & style: One night, a weekend loop, or a multi-week tour? Short trips favor lighter, simpler kits; long trips reward comfort and redundancy.
- Solo or two-up: Two riders can share bulkier items (larger tent, stove) but must split weight differently. Confirm what each rider can comfortably stow on their bike.
- Season & weather: Cold, wet or hot weather changes sleep-system and clothing choices. Expect rapid temperature swings in mountains; plan layers rather than single-purpose garments.
- Bike capacity: Know your bike’s payload limit and available mounting points. Check the owner’s manual for maximum cargo and recommended tire pressures with loads.
These early decisions drive trade-offs: more comfort = more weight and space; lighter setups mean faster packing and easier handling but can reduce warmth or shelter space. Decide which trade-offs you can live with rather than buying every piece of ‘one-more’ gear.
Route planning and realistic daily mileage
Good route planning reduces stress at the end of the day and keeps you safer. Plan flexibly: create an intended route and one or two lower-risk alternates.
- Daily distance: There’s no universal number, but use your experience and the route type. On twisty, unfamiliar or unpaved roads expect lower averages; on highways you can cover more ground. Conservative planning (shorter daily legs) preserves energy and leaves time for repairs, sightseeing and early campsite decisions.
- Fuel & services: Identify fuel stops, grocery and bike shops along your route. In remote areas, mark the last fuel before a long stretch. Carry a small reserve if you ride a bike with limited range, and learn how to read fuel maps or apps for the region.
- Arrival windows: Aim to reach your campsite with daylight to spare. Riding into unknown terrain or setting up camp after dark increases risk of mistakes and damage to gear.
- Check camping regulations: Public land, private land, and designated campgrounds have different rules. Confirm where overnighting is legal and whether reservations are needed.
Route planning is as much about contingency as it is about navigation. A clear, conservative plan reduces decision load when fatigue sets in.
Luggage systems and packing priorities
Find a luggage system that matches your bike and trip. Hard cases, soft saddlebags, tail bags and tank bags each have different strengths. Anchor your choices to load distribution and accessibility.
- Prioritize by access: Keep items you may need while riding in easy-to-reach places: rain gear, maps or phone, wallet, snacks, and a small tool kit in a tank bag or top case.
- Secure heavy items low: Place heavier items close to the bike’s center of gravity (low and central) to preserve handling. Lighter, compressible items (clothes, sleeping bag) belong higher or at the rear.
- Use compression and waterproofing: Compressible gear reduces volume and stabilizes the load. Waterproof sacks or dry bags protect against rain — for a tail roll example see the Marscamd 60L Waterproof Motorcycle Dry Bag Review: Tail Roll-Top.
- Mounting & tie-downs: Use rated straps and avoid using bungee cords for critical connections. Protect paint and plastics where straps cross.
- Weight limits: Always verify the bike’s payload and luggage rack limits from the owner’s manual. Don’t exceed the manufacturer’s specified maximum cargo weight.
Choice of luggage often determines whether your bike remains comfortable and safe to ride loaded. If in doubt, reduce non-essential items rather than cramming more into the bike.
Shelter and sleep systems: what matters most
A good night’s sleep is the single best investment for motorcycle camping. Prioritize a shelter and sleep system that fits your expected weather and sleeping habits.
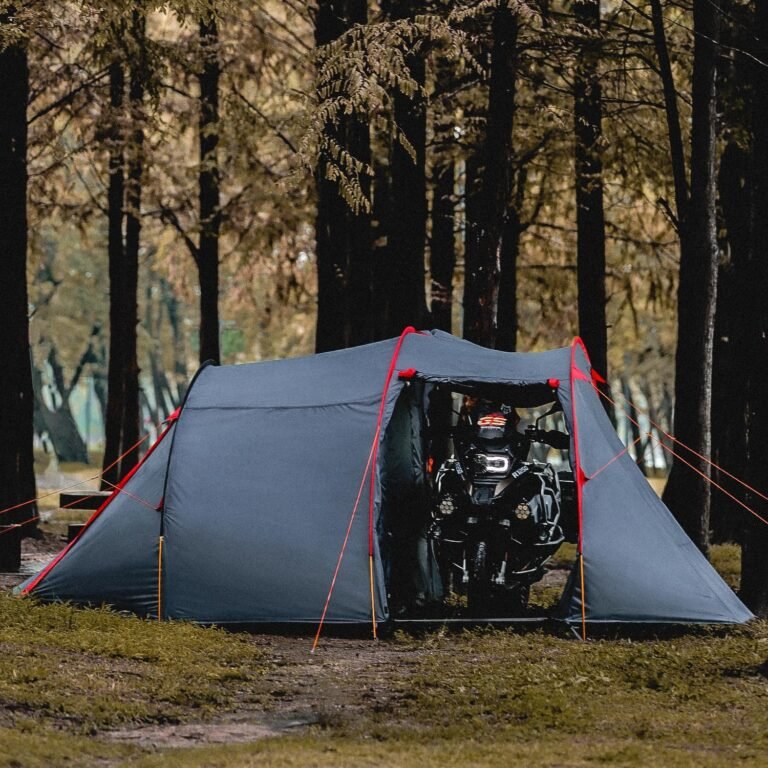
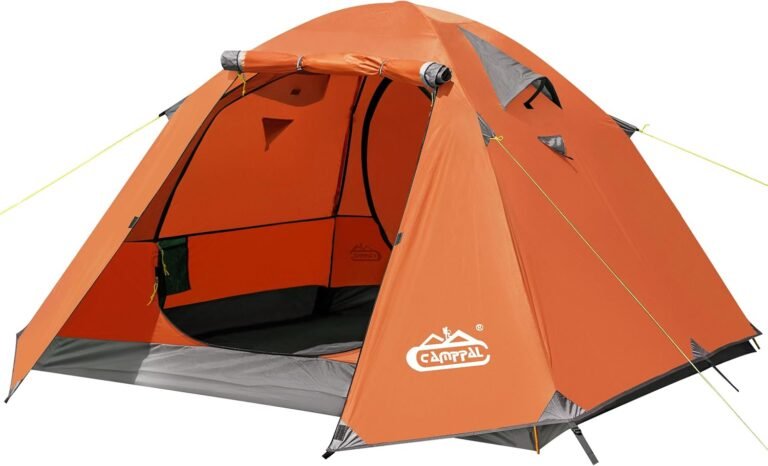
- Tent selection: Choose a tent sized for your needs and the conditions. A smaller, lighter backpacking tent saves space and wind exposure; a two-person tent gives extra room for gear or a second rider. Consider a tent with vestibules for storing boots and packs—see the 2-3 Person Backpacking Tent with Double Door 2 Vestibule for options that balance weight and space.
- Sleeping bag: Focus on temperature rating appropriate to the coldest night you expect, but remember that ratings are not absolute—verify the manufacturer’s tests and use a liner or down layer if you need flexibility. The VENTURE 4TH sleeping bag options are designed to be compressible and water-resistant for motorcycle use.
- Sleep pad: A durable insulating pad makes a big difference in comfort and warmth. Inflatable pads pack small but can puncture; closed-cell foam pads are durable, cheaper and can double as a seat on breaks.
- Platform & shelter alternatives: In fair-weather touring you may use a bivy sack, hammock (if you expect trees and know safe suspension methods), or tarp. Each reduces weight but trades off space and weather protection.
Test your tent and sleep system at home before a multi-night ride. Pack and pitch practice reduces setup time and frustration at the campsite.
Cooking and food planning for motorcycles
Cooking on a motorcycle camp is about simplicity and redundancy. A small stove, compact cookware and easy-to-prepare meals reduce fuel, weight and time.
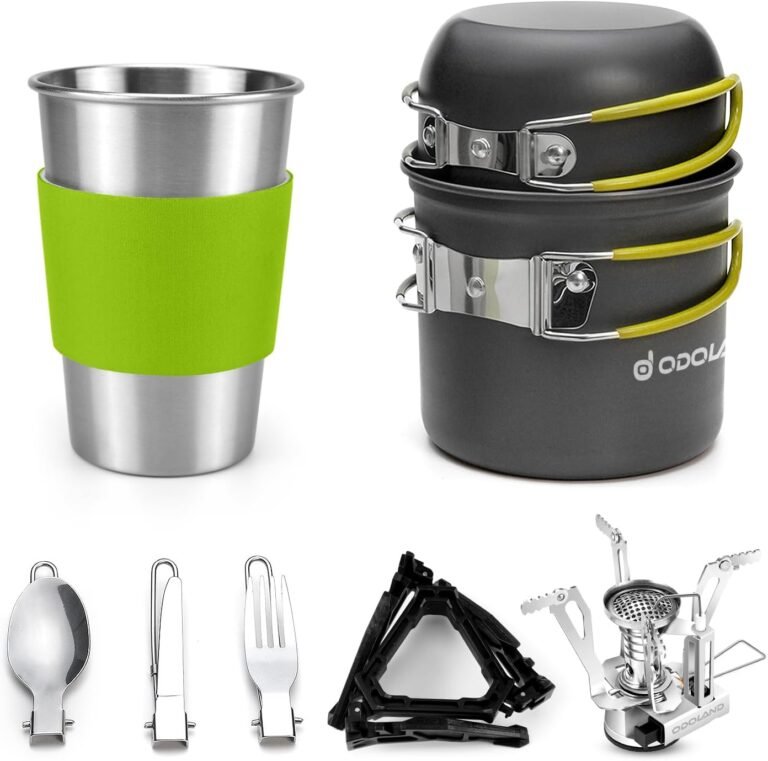
- Stoves & cookware: Small canister stoves or ultralight backpacking stoves cover most needs. Nested cookware sets save space; see examples such as the Odoland 16pcs Camping Cookware Mess Kit and ALOCS 9-Piece Camping Cookware Set which include nested pots and stoves. If you want a dedicated ultralight stove, check the AOTU Portable Camping Stove review for an ultralight option.
- Food choices: Prioritize calorie-dense, non-perishable, and easy-to-cook meals: instant rice/pasta, dehydrated meals, canned proteins (if you can pack out waste), and high-calorie snacks (nuts, bars). Bring a small amount of fresh food for the first day and plan resupply points.
- Water management: Know where you can refill water and carry a safe-capacity container. Consider a compact water filter or purification tablets in areas where natural water sources are used.
- Leave no trace: Pack out all food waste or dispose of it per campground rules. Scented food attracts wildlife; use bear lockers where provided or a smell-proof bag and hang food if in bear country following local guidance.
Cooking at camp saves money and provides a morale boost. Keep meals simple so cooking doesn’t stretch into darkness or exhaustion.
Clothing, layering and weather protection
Clothing strategy for motorcycle camping should separate riding protection from camp comfort while emphasizing layering for weather swings.
- Ride kit first: Your helmet, jacket, pants and boots are the first layer of protection. Consider removable thermal liners and waterproof shells that work for both riding and camp comfort.
- Layering for camp: Pack a warm mid-layer and a lightweight down or synthetic jacket for evenings. A thin base layer helps manage moisture when you’re active.
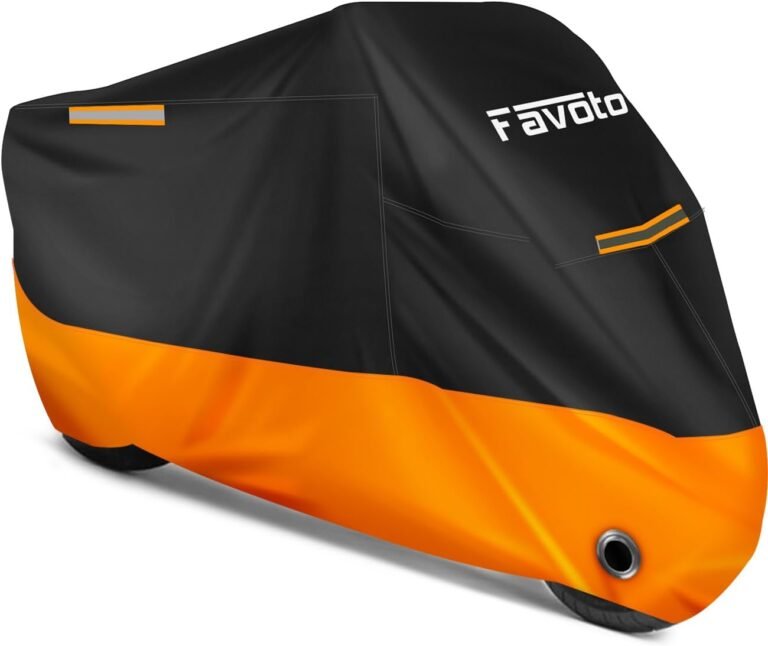
- Waterproofing: Bring a rain suit that fits over your riding gear. Waterproof bags and roll-top sacks protect sleeping gear and dry clothes. For a general motorcycle cover solution, see options such as the Favoto Motorcycle Cover for added protection when the bike is parked overnight.
- Boots & camp footwear: Keep one pair of comfortable camp shoes or sandals to reduce wear on riding boots and provide a comfortable option at camp.
Test layering choices before the trip to avoid surprises. If you expect very wet conditions, prioritize waterproofing and quick-dry fabrics over cotton-based clothing.
Camp setup, security and common low-tech comforts
Smart campsite setup saves time and keeps your gear safe. Treat your motorcycle as part of your camp layout.
- Site selection: Level ground, natural wind shelter and drainage are priorities. Avoid low spots where runoff will collect overnight. If you’re close to a road, set the bike angled so you can load/unload without blocking traffic.
- Bike security: Use a compact cable lock or disc lock if you’ll be away from the bike. Covering the bike can reduce attention and protect from morning dew—consider a lightweight motorcycle cover if you expect extended stops.
- Organized camp arrangement: Keep frequently used items near the tent entrance. Use a small hanging organizer or simple bag for utensils, headlamp and first-aid items. Store fuel canisters and cooking fuel away from sleeping quarters and ventilate when cooking.
- Comfort items: A small camp chair, a lightweight pillow or an inflatable pillow add comfort with low weight penalty and improve rest quality.
Prioritize safety and convenience over luxury. A quick, repeatable camp setup routine makes late arrivals manageable and reduces mistakes.
Safety, maintenance and tools on the road
A few tools and a basic maintenance plan will solve most problems without adding excessive weight. Focus on likely failures for your bike and route.
- Essential tools: A compact kit with a multi-bit driver, a set of sockets or wrenches for your bike’s fasteners, spare fuses, zip ties, a tire repair kit (plug kit or patch kit), and a small pump or CO2 inflator are useful. Tailor the tool list to your motorcycle — different models use different fasteners.
- Spare parts: Bring common consumables you can change roadside: a chain quick-link if appropriate, spare bulbs, and a tube if your bike uses tube-type tires. Verify compatibility before you leave.
- Fluids: Carry a small bottle of engine oil and brake fluid if your trip is long or remote, but check manufacturer recommendations and storage safety. Never guess fluid types—verify the correct fluids for your motorcycle before carrying replacements.
- Documentation & communication: Carry your registration, insurance, and roadside assistance info. A charged phone, power bank, and a navigation plan (offline maps or a paper map) are critical in areas with poor cell coverage.
Know how to do simple roadside repairs for your bike and practice at home. The more familiar you are with your tools and bike, the calmer you’ll be when something breaks.
Daily routines, fatigue management and pacing
How you structure each travel day matters more than how many miles you intend to cover. Build routines that control fatigue and preserve decision-making.
- Start-of-day checklist: Inspect tires, chain (if applicable), fasteners, and fluid levels. Secure your luggage and check that straps are tight. Give yourself a relaxed morning so you can eat, hydrate and dress in layers appropriate to the morning temperature.
- Break schedule: Stop every 60–90 minutes for a stretch, drink and quick inspection. Short, frequent breaks reduce fatigue and keep your focus sharp.
- End-of-day priorities: Get camp set up before dark, check bike security and stow electronics for recharging. Prepare tomorrow’s ride plan and weather check so you can leave promptly without last-minute stress.
- Listen to your body: If you’re unusually tired, shorten the day or choose a campground with amenities. Fatigue reduces reaction time and increases risk; conservative planning is good risk management.
Riding well on day three and four requires pacing on day one and two. Don’t treat the trip like a race—enjoyment comes from steady, sustainable riding.
Contingency planning and emergency kit essentials
Contingencies make the difference between a disappointing night and a manageable delay. Keep your emergency kit compact but practical.
- Basic first-aid: A compact kit with bandages, antiseptic wipes, blister care, pain relievers, and any personal medications. Learn how to use the contents appropriately.
- Navigation & signals: A charged phone and power bank, a small flashlight or headlamp, a whistle, and a basic survival blanket for unexpected night stops. In very remote areas consider a satellite messenger or PLB.
- Fire & shelter basics: Waterproof matches or a lighter, a small repair tarp, and a compact emergency bivy add options if your tent becomes unusable or you’re forced to shelter away from planned sites.
- Spare cash & copies of documents: Keep small cash and photocopies or digital copies of critical documents in a waterproof container separate from your wallet.
Review contingencies with any riding partners so roles are clear if something goes wrong. The goal is a small but effective kit that addresses the most likely problems without turning into a second campsite.